Space Giraffe
Space Giraffe Enemies
All the enemies of Space Giraffe explained.
Original text by: Jeff Minter
Enemy pictures by: PVB
SPOILERS ALERT!
Don’t read any further if you want later levels/enemies to be a surprise!
All these enemy types are deployed in various configurations as the player progresses through the game’s 100 levels. Individual parameters controlling each enemy types’ behaviour are varied on a level-to-level basis and also throughout the duration of a level in order to yield increasing challenge as the game progresses.
Audio is as important as the visuals in understanding what’s happening in-game; you may think the sound effects are funny or silly or both but they also are all there for specific reasons, and it behooves you to listen well. Learn enemy behaviours and their sound cues, then you can see what is going on even under most crazy visual disturbance. Don’t panic, you can hear them all!
Grunts
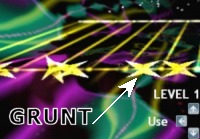
These are simple, X-shaped enemies which arrive at the far end of the surface, travel up towards the player, begin moving laterally, and upon reaching the near edge simply “walk” around the near edge. If they collide with a player who has no Power Zone, they will steal the player’s hoof, immobilising the player. If the player does not free his hoof (usually by using the Smart Bomb) before the capturing Grunt reaches the far edge of the surface then a life is lost.
If a Grunt collides with the head of the giraffe directly (while there is no Power Zone), then a life is lost.
Grunts may or may not fire according to the rules for a particular level.
Getting one’s hoof caught by a Grunt, or being killed by a Grunt, should be rare for a good player, because Grunts are entirely harmless and may be bulled off if there is any Power Zone active. Grunts should be seen as “bulling fodder”. Let them accumulate on the near edge, charge up the Power Zone, and bull them off for score and Bonus Multiplier increment.
Flowers
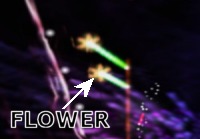
These are born at the far edge of the surface and grow up towards the player. Usually the player can shoot them with successive shots pushing the growth back away from the player. Flowers will grow to a specific height, wait for a certain amount of time, and then the head of the flower will come off, flying up towards the player, eventually passing “above” the player and off into space before disappearing.
Detached flower heads cannot be shot and are a collision hazard to the player. Detached flower heads cannot be bulled.
Shooting down flowers adds to the Power Zone. It is a handy technique to “cultivate” a Flower, shooting it occasionally to keep it from growing to full height and firing off its head. The player can keep shooting it for a bit of extra Power Zone as necessary.
Depending on the level rules, the amount that a flower recedes when shot may vary (on some levels it can be zero).
Depending on the level rules, the height to which a flower can grow may vary. The maximum height may be above the near edge, in which case the flower stalk is a deadly obstruction hazard to the player. The stalk cannot be bulled through; any contact is fatal to the player. The player may use Jump Pods to jump above the flower and shoot it back down below the near edge in such a case, or may simply wait for the flower to “mature”. the stalk hazard disappears once the flower head comes off.
Once a flower has grown to maximum height, the stalk turns from green to white. By observing this the player can see when the head will come off – when the stalk is fully white.
Flowers may be removed by shooting them right down to the far edge of the surface. Shooting arriving flowers early before they have a chance to grow yields a 1000 point bonus.
Some flowers on levels 81 and above have an extra attach when shot.
Containers
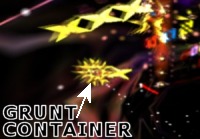
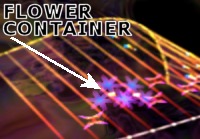
There are two kinds of Containers, Grunt Containers and Flower Containers. These float harmlessly up and down the surface until shot. Each shot that hits them launches one of the type of enemy that they contain.
The position to which the enemy is launched is determined in part by the position of the Power Zone. If the Power Zone is empty, shooting container-types deploys their payload right on the near edge, dangerously close to the player. In levels with container-enemies it pays to extend the Power Zone before shooting the containers.
Once the number of enemies carried in the Container is deployed the Container itself is destroyed. Containers themselves do not harm the player in any way; only the enemies they release pose any problem.
Boffins
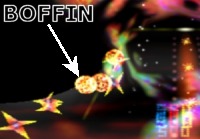
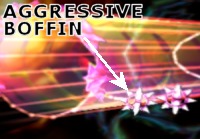
These appear in two varieties: chilled and aggressive. Chilled Boffins are round, whereas aggressive Boffins are spiky. Both types move in the same way, alternating through moving vertically (towards or away from the player) and horizontally (traversing across the surface). Aggressive Boffins fire aimed diagonal shots whilst in the traversing phase.
Boffins cannot be killed whilst moving vertically. They can be pushed back but they won’t die unless they are pushed right back off the web. Each time they are shot the vertical phase timer is reset and they try to move upwards more quickly; thus it is sometimes possible to find oneself in danger with a Boffin where you are shooting it constantly but it keeps trying to come up the Web no matter what. Your only recourse at that time is to stop shooting it, and either get it in the traversing phase or when it has reached the near edge.
Boffins can be killed with a single shot when in traversing phase.
When a Boffin reaches the near edge of the surface it rolls along the edge and is a collision hazard to the player. Boffins cannot be bulled. Boffins at the near edge can be killed by jumping above them and firing downwards, or by carefully extending a hoof towards them (this latter move is very risky and should only be attempted by very confident players).
Feedback Monsters
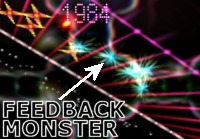
Again these can be passive or aggressive. Passive Feedback Monsters present a hazard to the player through causing pulses and flares in the whole environment when shot rather than through any behaviour of their own – they do not fire and they are bullable; however shooting them will cause a visual disturbance in the gameplay area for which the player must be prepared.
Both types of Feedback Monster begin at the far end of the surface and simply travel up to the near edge where they sit for a while before lifting off and eventually disappearing inter the space above the player. Aggressive Feedback Monsters will fire shots from above, down onto the near edge, as they rise above it, effectively interdicting parts of the near edge. For this reason aggressive Feedback Monsters should preferably be disposed of before they reach the near edge.
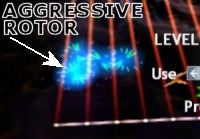
Rotors

Rotors’ main threat to the player is through disorientation. Rotors on the surface cause the entire surface to rotate. Under such conditions it behooves the player to remember that left and right on the left stick move the giraffe relative to its own orientation rather than as an absolute direction of motion – something which the player should have learned prior to meeting Rotors anyway through having manipulated the giraffe over surfaces of various shapes.
Shooting all the Rotors on a surface will cause the rotation to stop and the surface to stabilize until more Rotors appear.
Once again these come in two flavours, passive and aggressive. Passive Rotors simply float up and down the surface and do no harm at all to the player. Aggressive Rotors behave the same way but whenever they touch the near edge of the surface they will fire two shots along the near edge, one in either direction. The player will need to jump and shoot or Smart Bomb these shots. For this reason it is important to shoot aggressive Rotors promptly, and an audio “Danger!” warning is given when aggressive Rotors land on the far edge of the surface.
Zappers
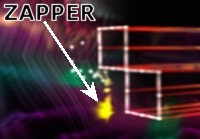
These appear on the higher levels. Zappers consist of two parts, one below the far edge of the surface and one above the near edge. The parts cannot be shot or destroyed by the player. Zappers track constantly back and forth across the surface. As they do an audible “countdown” is heard. Once a certain threshold is reached the Zappers fire. There is a period of about a half a second while the Zapper pulse builds up, accompanied by a very distinctive sound effect. Then the pulse fires and holds for a few seconds, and a laser beam connects the two zapper parts. This laser beam is a collision hazard for the player and cannot be bulled through.
The player can scuttle beneath a firing Zapper in the pulse buildup phase, but must avoid the beam during the firing phase. Zappers in the countdown stage are harmless. It is possible to use a Jump Pod to leap over a firing Zapper.
Care must be taken since a firing Zapper may destroy a player even during the end of level transition across the surface. the player is not entirely safe until he actually leaves the bottom edge of the surface.
Inside >>>